Silent Hill 2: Toluca Prison Walkthrough – All Collectibles: Memos, Glimpses of the Past, Strange Photos
Having unlocked the door, enter the Death Chamber and take the Medium Weight off the chair. Re-enter the cell block area to find all the previously locked cells opened, and the door leading back through the Guardroom locked. For a Strange Photo, go to the end of the cell block and enter Cell E1, where you can make a hole in the wall to reach the other side again. In Cell E13, you’ll find the Strange Photo.
Strange Photo #1: Four Months to Go
After setting the alarm off in the Serpent Section when you power the Witness Room Generator, re-enter the cell block and go to the end of the corridor. You can break open a hole in the wall in Cell E1 and use it to access the previous area you were just in. Inside Cell E13 on a shelf will be the Strange Photo.
To progress, go to Cell E10 and squeeze through the gap in the wall to reach the left-hand room with the Armory Key and ammo and health supplies inside. You can reach the Witness Checkpoint through the door, then unlock the next door to return to floor 1F Main Section. Now you have the Armory Key, you can unlock the cabinet with the Rifle inside.
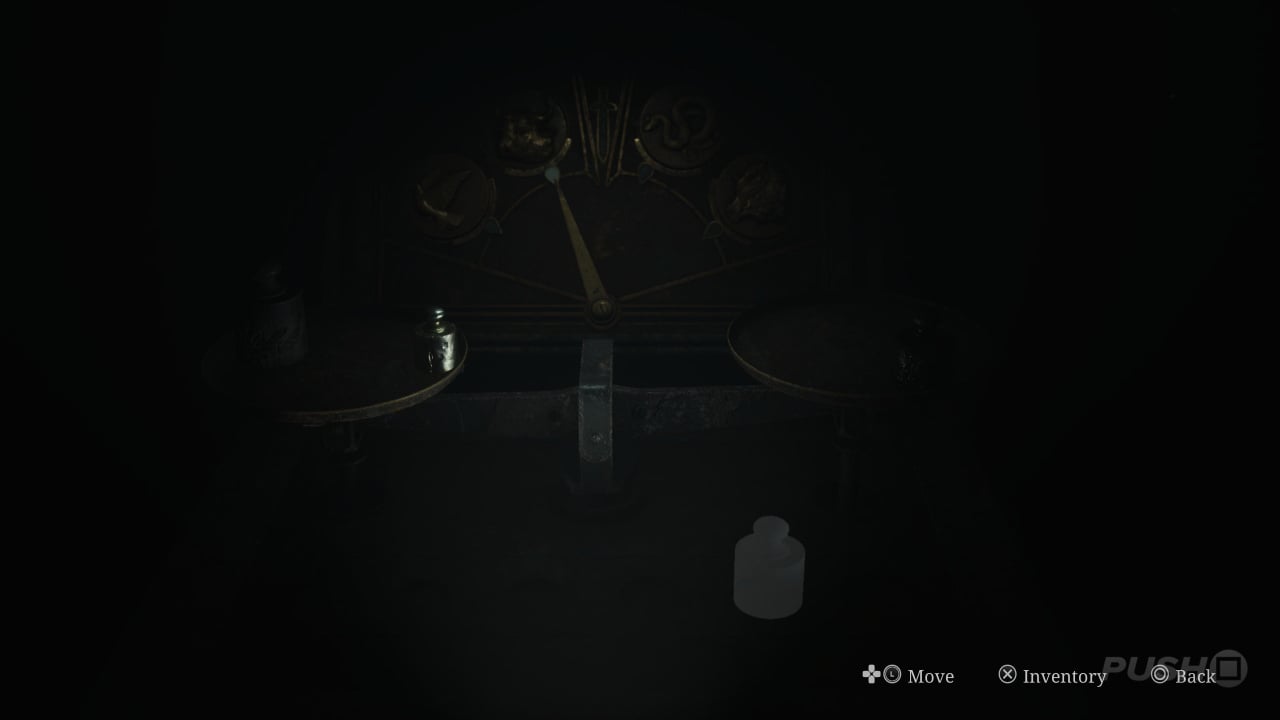
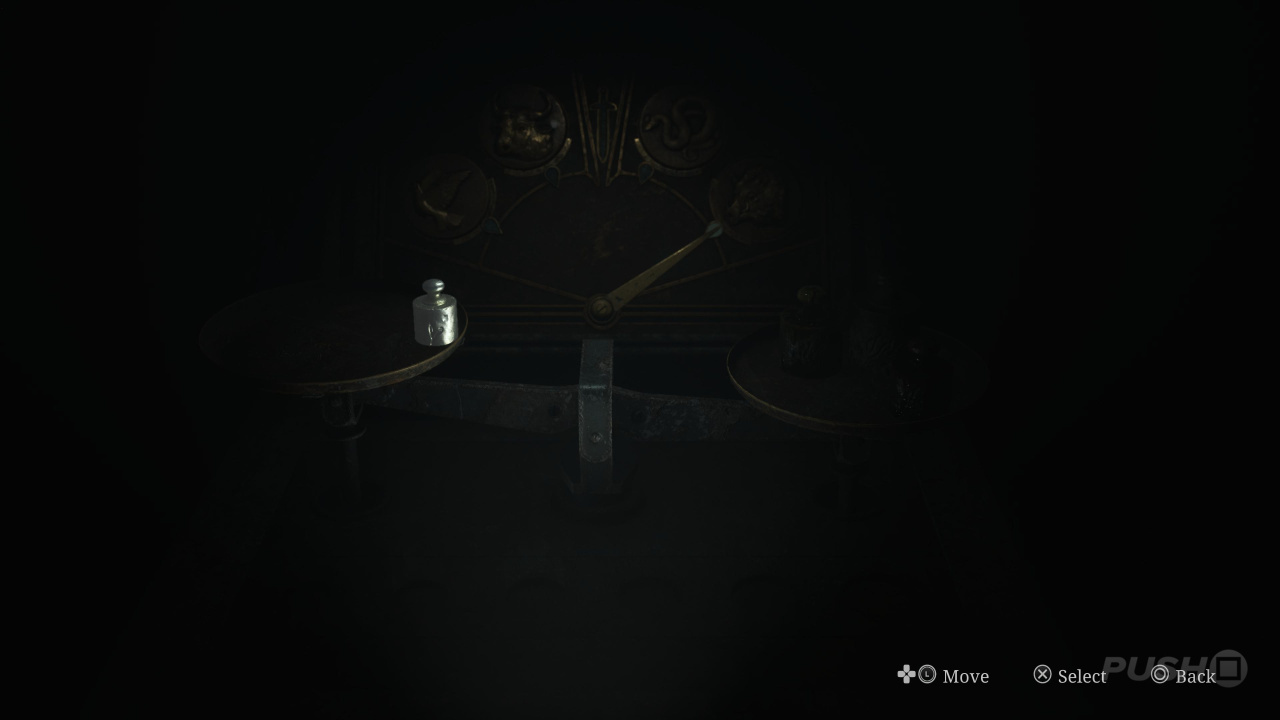
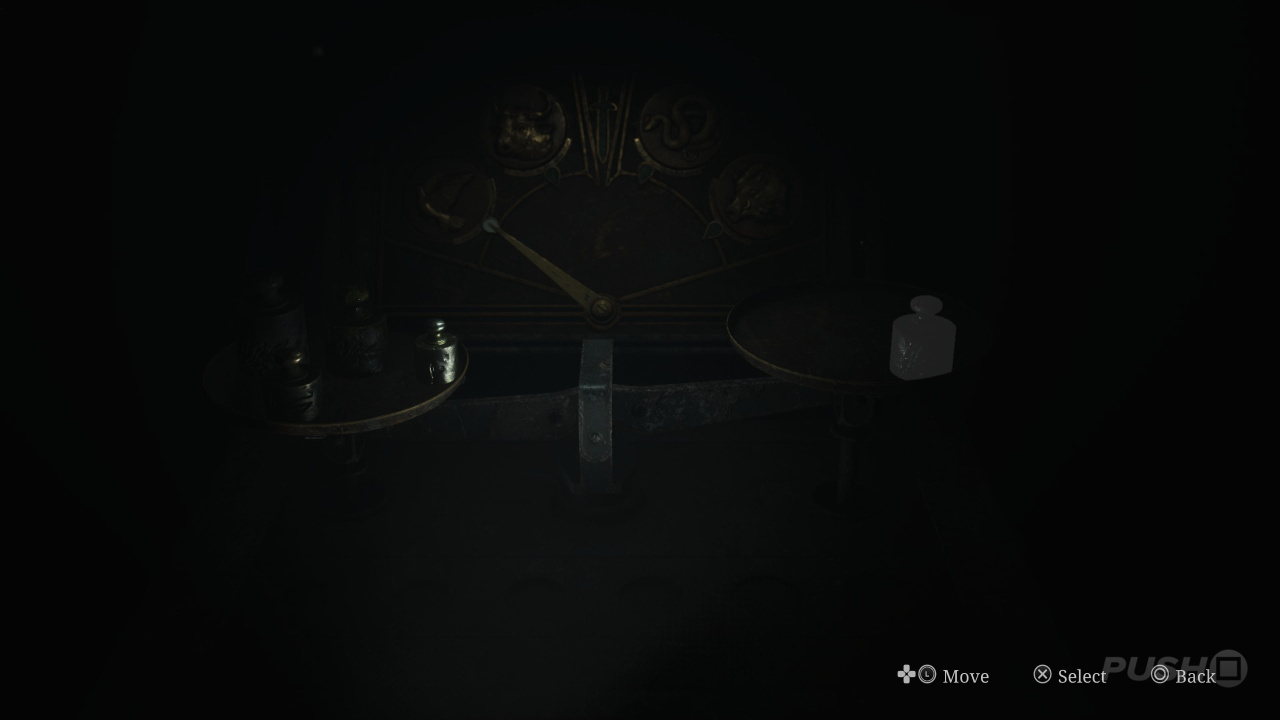
Now return to the Scales in the Yard and place the Heavy Weight and the Small Weight on the left-hand side, and the Medium Weight on the right. This unlocks the Hornless Ox door in Block A.
Head there next and take the stairs up to floor 2F. Take the Memo off the left-hand wall, then head right along Block C to the Guardroom, where in the desk drawer you’ll find the Block D Key.
Memo #3: Guard’s Letter
After arranging the weights on the Scales to unlock the Hornless Ox door, go up the staircase right after it and follow the corridor on floor 2F to the left to find the Guard’s Letter pinned on the wall next to a door.
Use the Block D Key to enter, then follow the corridor around to Cell D5 to find a Shiv Key hiding in the wall and a Threatening Note.
Memo #4: Threatening Note
Having found the Block D Key, enter Block D and head inside Cell D5. The Memo will be pinned to the wall in front.
The Shiv Key can be used unlock Cell C4 on this same floor, where a crawlspace will allow you access into the inner workings of the prison behind the cells. You’ll find a Paranoid Note on one of the pipes.
Memo #5: Paranoid Note
When you use the Shiv Key to unlock Cell C4, use the crawlspace and on the other side will be this Memo placed on a pipe.
Squeeze through the pipes on the left to find another crawlspace down on the ground to your right leading into the Toilets. You won’t find much in here, but continue on into the Changing Room for a Syringe, Rifle Rounds, and another Memo.
Memo #6: Crumpled Note
Shortly after Memo #5: Paranoid Note, pass through the Toilets into the Changing Rooms to find this Memo placed on a bench.
Enter the Showers area next to stock up on plenty of ammo, as well as a Glimpse of the Past on the right-hand wall as you enter. On the back wall is a hole James can stick his hand into; accept the search prompt 3 times to get the Heavy Weight. The room will come alive with enemies as soon as you pick it up, so be careful.
Glimpses of the Past #3
When you enter the Showers area on floor 2F, hug the right-hand wall from the perspective you enter from, and this Glimpse of the Past will be on the ground next to a moldy part of the wall.
Retrace your steps back through the Toilets and Block C to take the staircase back down to floor 1F and the Scales in the Yard. Now it’s time to unlock the Eyeless Boar door, which is done by placing the smallest weight on the left, and then all the others on the right. Go there now to gain access to the Boar Section of floor 1F.
Follow the corridor around to the right to enter the Warehouse, where 2 enemies need killing. You can then pick a Strange Photo up off the desk and grab some ammo.
Strange Photo #2: Old Man’s Always Prepared
Having arranged the weights on the Scales to open the Eyeless Boar door, head into the Warehouse via its eastern door and pick the Strange Photo up off the desk.
Leave and head for the Visitation Room next, where in the final booth will be a Memo called the Prisoner’s Letter.
Memo #7: Prisoner’s Letter
In the Visitation Room of the Boar Section on floor 1F, search the last booth to find this Memo.
Climb through the window next to the Prisoner’s Letter to reach the other side, then follow the path around to a corridor surrounding the Break Room. In its southwest corner is another one of the Glimpses of the Past, then in the Break Room itself is ammo and a note to read off in the smaller room where the desk is.
Glimpses of the Past #4
In the corridor surrounding the Break Room in the Boar Section of floor 1F, head for the southwest corner where chairs and beds are stacked up against a door. In front of them will be the Glimpse of the Past on the ground.
The Infirmary is your next port of call, where just as many ammo and health supplies await as there are enemies. Search the area once the latter are dead, then head for the back room to find the Upper Floor Key and a Memo on the desk opposite it. The Upper Floor Key can be used on the locked door in the corridor that surrounds the Break Room, so double back and unlock it next.
Memo #8: Unfinished Report
In the Infirmary area, head for the room at the back and you’ll find the Unfinished Report on a desk opposite the Upper Floor Key.
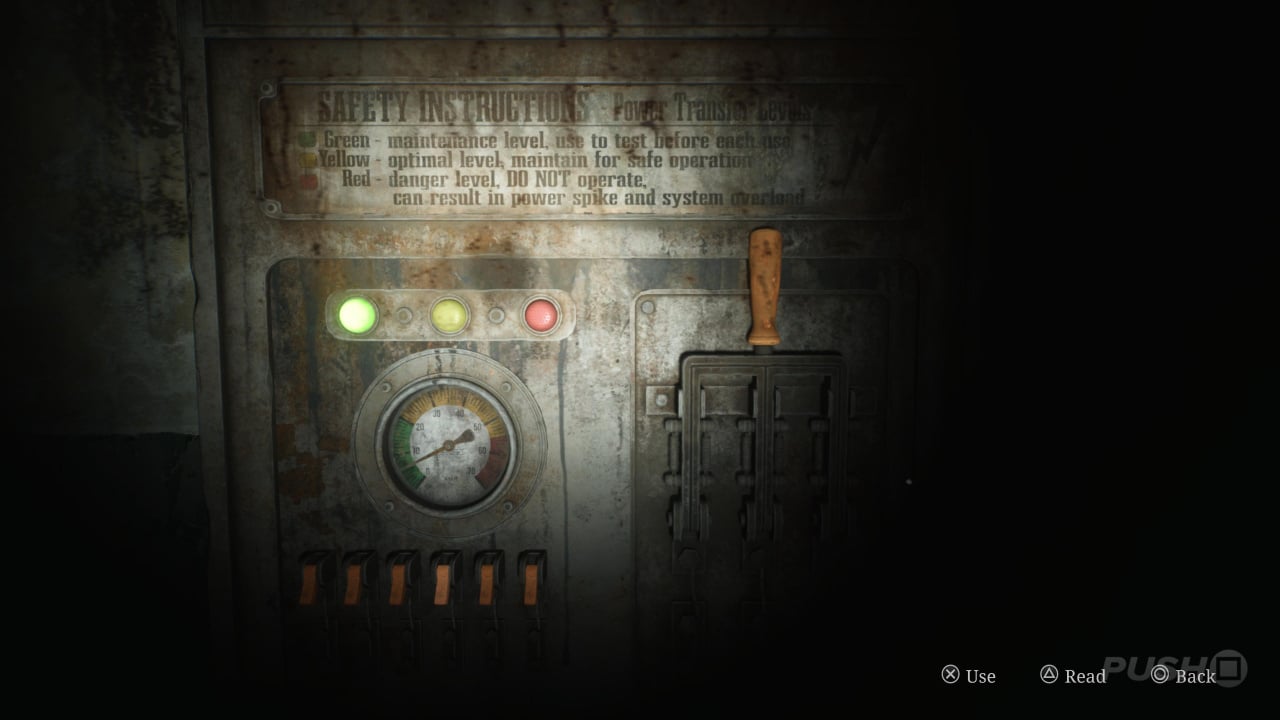
The staircase will take you up to a new section of floor 2F to unlock a shortcut into Block C and Block D, and then further up onto floor 3F to the Warden’s Office. Save your game in the room to the left, then interact with the Typewriter on the main desk. All you have to do here is press the “Tab” key — the one you default to when interacting with the Typewriter — 3 times. This opens a drawer below it to reveal the Light Weight.
Now go back to the Scales in the Yard and position the weights as follows to unlock the Wingless Dove door:
You’ll be in the Basement for this section, and will become trapped inside once you squeeze through the gap in the cells. You’ll find the occasional ammo and health supply in some of the cells, but your main task is to follow the corridor around to the room opposite Cell F15, accessed via a crawlspace on the floor. On the right is a panel next to the exit door, which can supply power to both Cell F5 and Cell F6 using it.
Turn both lights green, and go investigate the two cells. Inside Cell F6, you’ll find The Lightest Weight. Picking it up locks the door behind you, and it’ll seem like someone is banging it from the other side. Grab the Confession off the wall, then the banging will eventually stop.
Memo #9: Confession
Enter Cell F6 after supplying power to it and pick up The Lightest Weight off the ground. Doing so locks the door behind you and reveals the Memo pinned to the wall.
Once you’re able to leave Cell F6, enter Cell F9 and break a hole in the wall to access the ladder in Cell F10. This takes you back up to the main floor 1F, granting easy access to the Scales in the Yard. When you return, a Gallows will appear behind the Scales which depicts someone being hung and 2 Pyramid Heads. Make a save, then interact with the Scales. This time, you need to make the dial point straight upwards towards the sword. Here’s the solution to do so:
For solving the puzzle, you’ll earn the Execution Lever, which can be placed in the slot on the Gallows. You now need to match up poem verses, with the solution found through the link below:
Source link